New 14ct Solid Gold Piercing Hoop


Stacking Helix Piercings: How to Style Double & Triple Hoops
- A helix stack is two, three or four piercings along the upper outer ear rim, typically spaced 4–5mm apart
- Matching hoops in the same size and metal create the cleanest, most cohesive stack
- Graduated sizing (e.g. 6mm, 7mm, 8mm from top to bottom) creates a cascading effect that follows the ear’s curve
- Always heal one piercing at a time — space each new helix 4–6 months apart to avoid compounding healing stress
- Standard helix gauge is 18G or 16G — keep the same gauge across all piercings in the stack for visual consistency
- 14K solid gold across the entire stack creates the curated, cohesive look that makes stacking work
What a helix stack is
A helix stack is multiple piercings placed along the upper outer rim of the ear, each wearing its own ring or stud. The piercings run vertically down the rim, typically starting at the highest point of the helix and descending toward the mid-ear. When each piercing wears a matching gold hoop, the rings form a cascading row along the ear edge — one of the most visually striking and intentional ear arrangements.
The most common configurations are double helix (two piercings) and triple helix (three piercings). Some people go to four, but ear anatomy limits how many piercings can fit along the rim with adequate spacing. Your piercer will assess your ear and advise on maximum number.
Stacking is not the same as having random helix piercings. A stack is deliberate — the piercings are evenly spaced, positioned to follow the ear’s natural curve, and designed from the start to wear coordinated jewellery. The planning is what separates a stack from “I got three helix piercings over the years and they are kind of close together.”
Spacing and placement
Standard spacing: 4–5mm between each piercing, measured centre to centre. This creates enough room for each ring to sit without touching its neighbour while keeping the stack visually tight and cohesive. Closer spacing (3mm) risks hoops overlapping. Wider spacing (6mm+) makes the piercings look like separate piercings rather than an intentional stack.
Placement along the curve: a skilled piercer places each piercing to follow the natural curve of your specific ear. Ears are not symmetrical — the helix rim curves, thickens and thins at different points. Placing piercings at equal spacing along the curve (rather than in a straight mechanical line) ensures the hoops sit naturally against the ear rather than at awkward angles.
Planning a stack: if you know you want a triple helix, tell your piercer from the start — even if you are only getting the first piercing today. They will position piercing one with the future stack in mind, leaving optimal space for piercings two and three. Getting the first piercing without a plan and then trying to add more can result in uneven spacing or positions that do not follow the curve well.
Healing timeline
The non-negotiable rule of helix stacking: heal one at a time. Each helix piercing takes 4–6 months to heal. Do not get multiple helix piercings in the same session on the same ear.
Healing two or three cartilage piercings simultaneously on the same ear compounds every healing challenge: more total wound area, more pressure points during sleeping, more snagging risk with hair and clothing, and more strain on your body’s healing resources. Complication rates rise significantly with simultaneous cartilage piercings.
| Stack | Total timeline | Process |
|---|---|---|
| Double helix | 8–12 months | First piercing → heal 4–6 months → second piercing → heal 4–6 months → switch to hoops |
| Triple helix | 12–18 months | First → heal → second → heal → third → heal → switch to hoops |
| Quad helix | 16–24 months | Same sequential process — 4 rounds of healing |
Which order to pierce? Most piercers start with the highest position and work downward. This is partly practical (the highest helix is easiest to keep pressure-free during side sleeping) and partly aesthetic (if you need to wait months between piercings, having the top one done first lets you enjoy a single hoop while planning the rest).
Sizing your stack
There are two approaches to hoop sizing in a helix stack, and both look excellent:
Approach 1: Matching diameters
All hoops in the same diameter — typically 6mm or 7mm. This creates a uniform row of identically-sized rings running along the rim. The effect is clean, symmetrical and regimented. It is the simpler approach and the easier one to order for, because you buy multiples of the same ring.
Approach 2: Graduated diameters
Each hoop slightly larger than the one above it — for example, 6mm at the top, 7mm in the middle, 8mm at the bottom. This follows the ear’s natural widening as the rim curves downward and creates a cascading waterfall effect. The graduated approach requires more precise sizing but produces a more organic, flowing look.
Gauge for stacks
Use the same gauge across all piercings in the stack. Mixing gauges (e.g. 18G on one, 20G on another) creates visible inconsistency in wire thickness that disrupts the cohesion of the stack. If your piercings were done at different gauges, either match to the thinnest gauge across all of them, or visit your piercer to stretch the thinner piercings up to match the thickest.
| Gauge | Wire | Stack look |
|---|---|---|
| 18G STANDARD | 1.02mm | Defined, visible rings. The most popular gauge for helix stacks. Bold enough to register, fine enough to look elegant. |
| 20G | 0.81mm | Finer, more delicate. Creates a thread-like cascade. Matches nostril gauge for cross-piercing consistency. |
| 16G | 1.27mm | Chunky, bold. Maximum visual weight. Statement stack. Requires piercings done at 16G. |
Styling options
All hoops
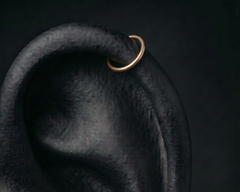
The classic stack. Every position wears a seamless hoop. This creates a row of rings along the rim that reads as a single design element. In 14K gold, three matching hoops catch light and create a warm, defined line along the upper ear. This is the look that most people picture when they think of a helix stack.
All studs
The subtle stack. Every position wears a flat-back stud with a matching ball or disc top. This creates a row of evenly-spaced dots along the rim — minimal, architectural and significantly less visible than hoops. The stud stack works in every professional setting and is the most sleep-friendly configuration.
Mixed: hoops + stud
Two hoops and one stud, or one hoop and two studs. Mixing styles creates visual rhythm — the hoop draws the eye to a focal position while the studs provide supporting accents. A common combination: studs at positions one and two, hoop at position three (the lowest), creating a cascade that climaxes with the ring.
Mixing with other piercings
A helix stack does not exist in isolation. It sits on the same ear as your other piercings. The best stacks consider the full ear:
Helix stack + tragus hoop: rings at the top and front of the ear. The helix stack runs the rim; the tragus accents the entrance. All in matching gold creates a cohesive ear.
Helix stack + conch hoop: the helix stack on the outer rim, the conch hoop wrapping through the inner bowl to the same outer rim. These two elements interact visually — the conch hoop may sit between or below the helix hoops, creating a layered, interleaved effect.
Helix stack + forward helix + lobe: a fully curated ear. Stack at the top, forward helix at the front, lobe at the bottom. Three zones, each with its own accent, all in matching 14K gold. See our forward helix jewellery guide for the front fold options.
Why matching metal matters
A helix stack lives or dies by consistency. Two gold hoops and one steel hoop breaks the visual effect entirely. The eye immediately spots the odd one out, and the stack reads as “mismatched piercings” rather than “curated design.”
14K yellow gold across the stack is the most popular choice. The warm gold tone creates a cohesive line that reads as fine jewellery. Every ring in the same metal, same colour, same finish — the consistency is what makes a stack look intentional.
Practical benefit of matching material: if one piercing develops a reaction (unlikely with 14K gold, but possible with cheaper metals), it is harder to diagnose which piercing is the problem when all three use different materials. Matching material eliminates this variable entirely.
Budget approach: if 14K gold across all three positions is beyond budget initially, start with implant-grade titanium for healing. Once all piercings are fully healed, upgrade to 14K gold one at a time. The end goal is matching metal across the stack.
| Material | Stack suitability |
|---|---|
| 14K solid gold BEST | Perfect. Warm, cohesive, zero reactivity. The industry standard for curated ear stacks. |
| Implant-grade titanium | Good for healing. Silver tone. Consistent across positions but lacks gold warmth. |
| Mixed metals | Avoid. Breaks visual cohesion. One odd ring ruins the entire stack effect. |
| Surgical steel / plated | Avoid entirely. Bump risk is compounded with multiple piercings. One reaction can trigger bumps on adjacent piercings. |
Preventing stack bumps
Multiple helix piercings on the same ear amplify bump risk because each piercing is an additional pressure point, snagging point and potential material reaction site. The rules for preventing individual helix bumps apply, but with added importance:
Sleep management is critical. With a single helix, you can sometimes get away with occasional sleeping on the pierced side. With a stack, the compounding pressure across 2–3 piercings means even one bad night can trigger bumps on multiple piercings. Travel pillow, every night, throughout all healing phases.
Hair management. More piercings = more places for hair to snag. Tie long hair back during all healing periods. Check for strands wrapped around jewellery every morning.
Same safe material across all piercings. One cheap ring in a stack of three can cause a reaction that inflames the entire area, affecting all three piercings. Use 14K gold or titanium across every position from day one.
If a bump does develop on one piercing in the stack, treat it using the protocol in our helix bump guide. The adjacent piercings may be fine and do not need intervention unless they also show symptoms.