How Long Until I Can Change My Cartilage Piercing?
- Cartilage piercings take 6–12 months to fully heal — not 6–8 weeks like lobes
- The piercing will look and feel healed long before it actually is. Surface healing happens in weeks; cartilage channel maturation takes months.
- The safe minimum to change jewellery: helix and tragus at 6 months, rook and daith at 9–12 months, industrial at 12+ months
- Four signs to check before changing: zero tenderness, zero discharge, zero crust, and symptom-free for at least 4 consecutive weeks
- Changing too early is the most common cause of cartilage bumps, and the resulting bump can take months to resolve
- The downsize appointment at month 3–4 (swapping the initial long post for a shorter one) is not the same as a jewellery change — it must be done by a piercer
Why cartilage takes so much longer than a lobe
A lobe piercing heals in 6–8 weeks. A cartilage piercing heals in 6–12 months. The difference is not pain tolerance or aftercare effort — it is biology. Cartilage is avascular tissue: it has virtually no direct blood supply. Nutrients, immune cells and the building blocks of healing all reach cartilage by slow diffusion from surrounding soft tissue rather than through blood vessels. Everything that would take a lobe a week takes cartilage a month.
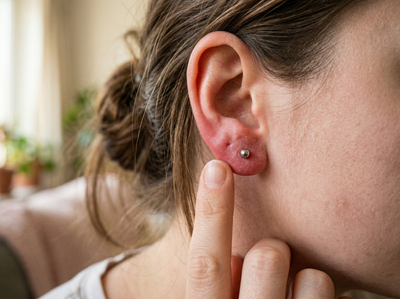
What makes this confusing is that the surface of a cartilage piercing heals at lobe speed. The skin around the entry and exit holes closes within days to weeks. From the outside, the piercing looks healed. Touch it and it might feel fine. But inside, the cartilage channel is still soft, fragile tissue that has not yet formed the mature, keratin-lined tunnel it needs to be. Push jewellery through this immature channel and you create a micro-tear, trigger a fresh inflammatory response, and can easily set a bump forming that takes 6–8 weeks to resolve on its own.
Minimum safe timelines by piercing location
These are the minimum timelines before a first jewellery change, assuming perfect aftercare, no bumps, and zero symptoms for at least 4 continuous weeks before the change. Piercings that had bumps, infections or other complications during healing need additional time beyond these minimums.
| Piercing | Minimum before change | Average fully healed | Note |
|---|---|---|---|
| Helix (upper) | 6 months | 6–9 months | Most forgiving cartilage piercing. Still needs the full 6 months. |
| Helix (mid/lower) | 6 months | 6–9 months | Lower helix has slightly thicker rim. Similar timeline. |
| Forward helix | 6 months | 6–12 months | Tight anatomical fold. Slower than standard helix. |
| Tragus | 6 months | 6–12 months | Thick cartilage nub. Change without piercer is tricky. |
| Anti-tragus | 6–9 months | 9–12 months | Rarely pierced; healing is less predictable. |
| Rook | 9 months | 9–12 months | Thickest cartilage fold. Never change before 9 months. |
| Daith | 9 months | 9–12 months | Deep fold, slow diffusion. Similar to rook. |
| Conch | 6–9 months | 9–12 months | Flat cartilage bowl. Change from stud to hoop requires correct sizing. |
| Industrial | 12 months | 12–18 months | Two piercings healing simultaneously. Longest cartilage healing time. |
The four readiness signs
Time alone is not sufficient to confirm healing. A piercing that has been irritated, bumped or exposed to reactive metal throughout the minimum period will not be healed at the minimum date regardless. Before changing any cartilage jewellery, check all four of these:
The downsize is not a jewellery change
At month 3–4 of healing, your piercer should swap the initial long post for a shorter one that fits your anatomy now that swelling has fully subsided. This is called a downsize, and it is an essential part of healing — not an optional style choice.
Why it matters: The initial post is deliberately long to accommodate week-1 swelling. Once swelling settles, that extra length means the post sticks out and catches on hair, clothing and pillowcases constantly. Each catch is a micro-irritation to the channel. Downsizing eliminates this and significantly reduces bump risk from month 4 onwards.
The downsize is done by a piercer using a taper or through careful direct insertion. It is not the same as you changing your own jewellery at home. The piercing is still healing at month 3–4, and the act of changing the post requires expertise to avoid disrupting the fragile channel. After the downsize, the shorter post stays in until the piercing meets all four readiness signs.
If you skipped the downsize because the piercing seemed fine, book one now. A too-long post sitting in a healed piercing for months causes the same micro-irritation as it would during healing — it just produces bumps rather than delayed healing.
What happens if you change too early
This is the most important section, because it answers why the timeline matters in practice — not just in theory.
You create a micro-tear. The cartilage channel at month 3 is soft, immature tissue. Pulling a piece of jewellery through it drags and tears the lining. This is not catastrophic — you may not even feel it. But it starts a fresh inflammatory response that takes weeks to settle, during which the channel is more vulnerable to everything else.
A bump forms. The micro-tear triggers an irritation bump at the entry or exit hole within days to 2 weeks. This bump looks just like the bumps described in our cartilage bump guide — small, pink, firm, at the piercing hole. It is an irritation bump, not an infection. It will resolve on its own in 2–8 weeks if the new jewellery fits correctly and aftercare resumes. But 2–8 weeks is a long penalty for a change you were not ready for.
The channel may close around new jewellery. If the replacement jewellery is the wrong diameter or gauge, the healing channel can conform around it. A hoop that is slightly too small creates sustained pressure on the channel walls that causes chronic irritation. The channel cannot distinguish between "this hoop is too small" and "something is wrong" — it simply keeps producing an inflammatory response until the stimulus is removed.
If the new jewellery will not go in, the channel starts to close. Every minute after the original jewellery is removed, the cartilage channel narrows. In a fully healed cartilage piercing, this is slow — you have several minutes before it becomes difficult. In a partially healed piercing at month 3, it is much faster. If you remove your jewellery and then cannot get the new piece in, the channel may have already partially closed. At this point, forcing the new piece in tears the channel wall. Put the original jewellery back in immediately and see a piercer.
Do cartilage piercings close?
Yes — all piercings can close, and cartilage piercings close differently at different stages of healing.
During healing (months 0–6): Cartilage channels narrow rapidly without jewellery. In the first 2 months, a cartilage hole can close enough to block re-insertion within hours of removing the jewellery. Never leave a healing cartilage piercing empty overnight. If the jewellery falls out, replace it immediately or go to a piercer within hours.
Partially healed (months 3–9): The channel is more established but still actively maturing. Without jewellery, it will narrow to the point of difficulty within days. Full closure can happen in weeks. Re-opening usually requires a taper from a piercer.
Fully healed (12+ months): A well-established cartilage piercing can survive days or even weeks without jewellery before closing significantly. The rate depends on how long the piercing has been healed, how thick the cartilage is, and individual variation. Some people’s well-healed helix piercings survive a month without jewellery; others find the same piercing blocks after a week. There is no reliable universal rule.
Old cartilage piercings that appear closed: If a cartilage piercing looks closed on the surface but has been healed for years, the channel may still be present internally even if you cannot see the surface holes. A piercer can sometimes open these with a taper. Do not attempt this yourself — if the channel has truly closed, forcing a taper creates a new piercing through scar tissue, which is a longer healing process than an original piercing.
Making the first change correctly
Once all four readiness signs are met and you are past the minimum timeline, here is the safest approach to the first jewellery change:
Have a piercer do it. For any piercing inside the ear (rook, daith, forward helix), and for your first change on any cartilage piercing, visiting a piercer is strongly recommended. They can see what you cannot, insert correctly without disturbing the channel, and immediately identify if something is wrong. The cost is £10–£20 and the process takes 5 minutes.
If doing it yourself: Wash hands, set up a two-mirror system for piercings you cannot see directly, open the new jewellery before removing the old piece, and complete the swap in under 60 seconds. See our full technique guide: how to put in a cartilage hoop.
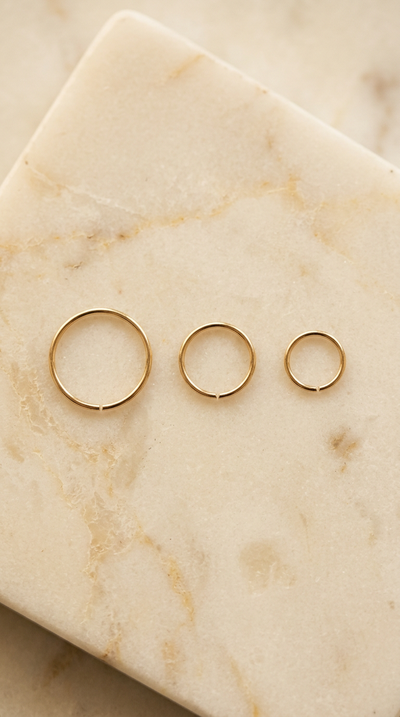
Jewellery to choose for the first change: Match the gauge exactly (16G for most cartilage). Choose the correct diameter for your anatomy — a hoop that is too small pinches and creates a bump immediately. For rook piercings specifically, see our rook hoop size guide. For all other cartilage, see our cartilage size guide. Use 14K solid gold or implant-grade titanium only.