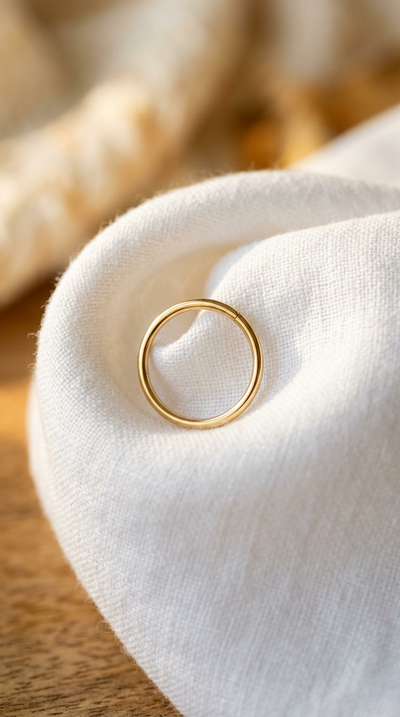
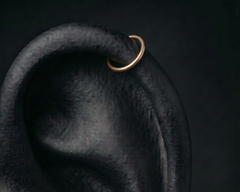
New 14ct Solid Gold Hoop


How to Put In a Helix Hoop: Seamless Ring Guide
- The helix is the most straightforward ear piercing to change to a hoop — the thin ear rim is accessible from both front and back
- Insert the ring from behind the ear, pushing forward through the helix rim — your fingertip guides the wire into the hole
- Only switch after full healing: 6–12 months for cartilage, zero tenderness, zero discharge
- A 6–8mm seamless ring in 18G or 20G is the standard helix hoop size
- Twist the ring open — never pull — to keep it circular
- Hair snagging is the biggest practical challenge with helix hoops — be mindful when brushing and dressing
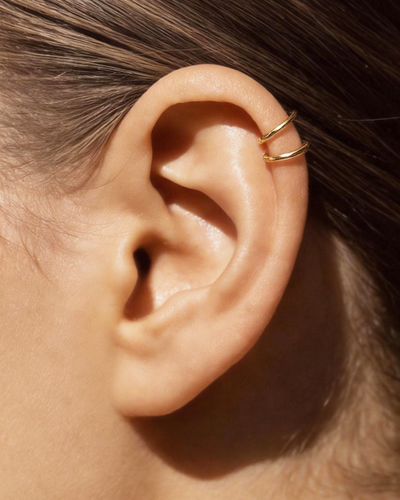
Why the helix is the easiest
Of all the ear piercings that use hoops, the helix is the most beginner-friendly to change at home. The reason is simple anatomy: the helix rim is a thin fold of cartilage along the outer edge of the ear. Both sides of the piercing — front and back — are fully visible in a mirror and accessible to your fingers. You can see the hole, see the ring threading through, and see the ring closing. No blind spots, no awkward angles.
Compare this to the tragus (where you cannot see the hole at all), the conch (where the ring must wrap around the outer rim), or the daith (which sits in a deep fold). The helix is a straight pass through a thin piece of cartilage, and the ring wraps a short distance around the rim. Most people manage their first helix hoop change in under five minutes.
Before you start
Confirm healing. Helix piercings are cartilage and take 6–12 months to fully heal. The piercing must show zero tenderness when touched, zero discharge, and zero crusty buildup. If any of these are present, wait longer. A hoop in an unhealed helix will rotate in the channel and cause an irritation bump.
Check your size. Helix hoops are typically 6–8mm inner diameter in 18G or 20G. A lower placement on the helix needs a smaller ring (6mm snug). A mid-helix placement typically suits 7mm. A higher helix may need 8mm. See our helix hoop size guide for measuring instructions.
What you need
Clean hands — wash thoroughly with soap and warm water.
Saline spray — to clean the piercing and the ring before insertion.
A mirror — a standard bathroom mirror works perfectly for helix piercings. You can see both sides of the ear rim clearly.
Your seamless ring — rinsed with saline, dried with a paper towel.
Ring-opening pliers (optional) — helpful for thicker gauges (16G) or if you have difficulty gripping small rings. Not essential for most helix hoops in 18G or 20G.
A hair clip or band — pin your hair back so it does not interfere. Hair catching on the ring during insertion is a common frustration.
Removing the stud
Opening the seamless ring
Step-by-step insertion
Forward helix: different angle
If your piercing is a forward helix (at the front of the ear, where the helix meets the face), the insertion process is the same but the angle changes. The forward helix faces forward and downward, making it harder to see in a standard mirror. You may need to angle your head or use a handheld mirror for a better view.
Forward helix hoops are typically 5–6mm — smaller than standard helix hoops because the cartilage fold is tighter at the front of the ear. The smaller ring size makes handling slightly more fiddly. Take your time, and consider having a friend help with the first insertion.
The insertion direction is the same: from behind the ear, pushing forward. Your fingertip behind the forward helix locates the hole, and the wire passes through the thin cartilage fold just as it does on a standard helix.
Troubleshooting problems
The ring will not go through
The helix is thin cartilage, and the channel is short. If the ring meets resistance, the most common reasons are: you are not aligned with the channel (try adjusting the angle slightly), the gauge is wrong (too thick), or the channel has begun to tighten. Spray saline to lubricate, wait a minute, and try again gently from a slightly different angle.
The ring sits crooked
A ring that tilts rather than sitting flat against the helix is almost always too small. The ring cannot complete the curve around the cartilage rim, so it angles off to one side. Try the next size up. If you are using 6mm, try 7mm.
I cannot close the ring flush
Small helix rings (6mm in 20G) are the most fiddly to close because the wire is thin and the ring is tiny. If your fingers are too large to grip precisely, ring-opening pliers with flat jaws solve the problem instantly. They grip both sides of the join and let you twist with controlled precision.
Hair keeps catching on the ring
The helix sits on the outer rim of the ear, directly in the path of hair. Long hair, especially when brushing, pulling on hats, or removing clothing over the head, frequently catches on helix hoops. This is the single most common daily annoyance with helix jewellery. Solutions: pin hair back when dressing, brush carefully around the ear, and consider a flat-back stud for high-activity days when snagging is likely.
The ring keeps opening
If the ring opens on its own, the ends are not aligned properly (there is a slight gap or misalignment), or the wire is too thin for the amount of activity it encounters. Ensure the ends meet perfectly flush. If the ring still opens, the gauge may be too thin for your lifestyle — consider stepping up from 20G to 18G for a sturdier ring that holds its shape better.
After insertion
Saline twice daily for 3–5 days. A jewellery change is a minor disruption to the channel, even in a fully healed piercing. Brief saline care helps the tissue settle around the new ring.
Do not twist or spin the ring. The channel will adapt to the ring on its own. Rotating the ring creates micro-friction that can irritate the cartilage.
Sleep on the opposite side for a few nights. Pillow pressure on a freshly inserted hoop can shift it or press it into the cartilage. After 3–5 days, sleeping on either side is fine for most people — the helix tolerates pressure better than the conch once healed.
Watch for hair snagging. The first few days with a new helix hoop are when snagging accidents are most likely, because you are not yet accustomed to the ring being there. Be deliberate when touching your hair, putting on or removing hats, and pulling clothing over your head.
Watch for bumps. A small irritation bump in the first week is possible, especially if the piercing was not quite as healed as you thought. Continue saline care. If the bump persists beyond two weeks, the piercing may need more healing time, or the ring may be the wrong size.
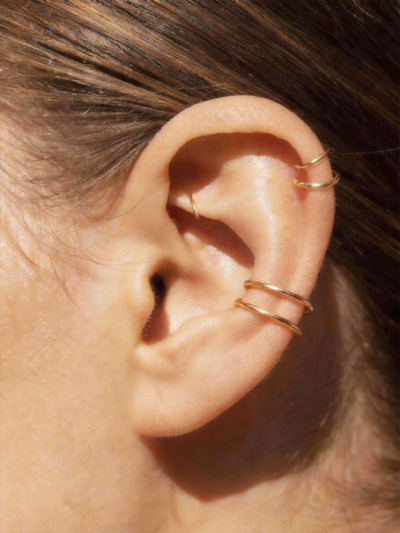
Double and triple helix hoops
If you have multiple helix piercings and want to wear hoops in all of them, change them one at a time. Insert the lowest hoop first, then work upward. This prevents the rings from interfering with each other during insertion.
For a stacked helix look, matching all hoops in the same metal, gauge, and diameter creates the cleanest aesthetic. Three 7mm hoops in 20G 14K yellow gold, evenly spaced along the helix rim, is one of the most popular curated ear looks. The uniform size and metal creates visual rhythm and cohesion.
If your piercings are at different heights on the helix, you may need different diameters. Lower helix piercings (closer to the lobe) often need 6mm. Mid-helix piercings suit 7mm. Upper helix piercings may need 8mm because the ear is slightly wider at the top. Measure each position individually rather than assuming one size fits all.