How to Put In a Nose Hoop: Step-by-Step for Seamless Rings
- A seamless ring has no visible clasp — you open it by twisting the ends apart, not pulling them outward
- Always wash your hands and clean the ring with saline before insertion
- Insert the thinner end of the opening into your piercing first, then guide the ring through and twist shut
- The gap should close completely flush — you should not feel a catch when you run your finger over it
- Only switch from a stud to a hoop once your nostril piercing is fully healed (3–6 months minimum)
- If this is your first hoop, consider having your piercer do the initial insertion
What is a seamless ring
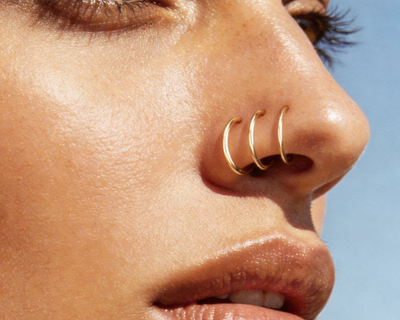
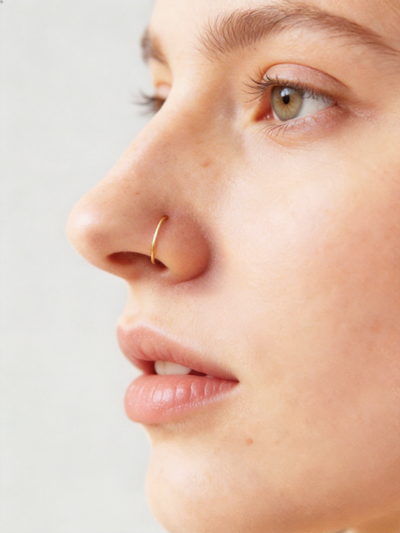
A seamless ring (also called a continuous ring) is a simple hoop made from a single piece of wire bent into a circle. There is no hinge, no clasp, and no click mechanism. The two ends of the wire meet to form an almost invisible join. When closed properly, the ring looks like a perfect, unbroken circle.
This is the classic nose hoop style. It sits flush against the nostril, looks minimal, and works beautifully in 14K solid gold because the clean design lets the metal speak for itself.
| Ring type | How it opens | Best for |
|---|---|---|
| Seamless ring THIS GUIDE | Twist ends apart | Nostril, helix, tragus, conch, lobe — the minimalist standard |
| Segment ring | Remove a small segment piece | Septum, daith — very secure closure |
| Clicker ring | Hinged clasp clicks open/shut | Septum, daith — easiest to insert but bulkier |
| Captive bead ring (CBR) | Pop out a bead held by tension | Various — traditional style, harder to close at home |
Before you start
Make sure your piercing is fully healed. For nostril piercings, this means at least 3–6 months since the initial piercing with zero tenderness, zero discharge, and zero crusty buildup. If there is any sign of healing still in progress, do not insert a hoop. The movement of a ring in an unhealed channel causes irritation bumps, extended healing, and potential infection.
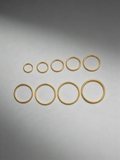
Check your ring size. You need to know both the inner diameter (6mm, 7mm, 8mm) and gauge (18G, 20G, 22G) before attempting insertion. A ring that is too small will not fit around your nostril. A ring that is too thick will not pass through the piercing hole. See our nose ring size guide if you are unsure.
What you need
Clean hands — wash thoroughly with soap and warm water.
Saline spray or sterile saline solution — to clean both the piercing and the ring.
A well-lit mirror — a magnifying mirror is even better. Good lighting makes everything easier.
Your seamless ring — ensure it is clean. Rinse with saline or soak in warm saline for a minute before handling.
Ring-opening pliers (optional) — small, flat-jaw pliers specifically for body jewellery. These help if you have difficulty opening the ring with your fingers alone. Regular household pliers will scratch and damage the metal — do not use them.
How to open a seamless ring
This is where most people go wrong. The instinct is to pull the ends apart like opening a letter — outward, away from each other. Do not do this. Pulling outward warps the ring into an oval shape that will never close flush again.
The correct technique is a twist:
Step-by-step insertion

Common mistakes
Pulling the ring open instead of twisting. This warps the circle into an oval. Once deformed, the ring will never close flush. Always twist the ends in opposite directions, keeping the ring circular.
Opening the gap too wide. You only need 2–3mm — just enough for the wire to enter the piercing channel. A larger gap means more force to close, and increases the risk of bending or kinking the ring.
Inserting from the outside in. Many people try to push the ring through from the front of the nose. This is harder because you cannot see or feel the exit point inside your nostril. Going inside-out gives you fingertip control over where the wire enters the channel.
Using dirty hands or unclean jewellery. Even a healed piercing can become irritated if bacteria enters the channel during a jewellery change. Always wash hands and rinse the ring in saline first.
Leaving a gap in the ring. If the two ends do not meet completely, the exposed wire edges can catch on the inside of your nostril, causing irritation and micro-tears. Take the time to close the ring properly. If you cannot get it fully closed, use ring-opening pliers or visit your piercer.
Switching to a hoop too early. This deserves repeating. A hoop moves constantly in the piercing channel. In an unhealed piercing, that movement disrupts the forming fistula and almost always results in an irritation bump. Wait until the piercing is completely settled — no tenderness, no discharge, no crust.
Troubleshooting
The ring will not go through
If the wire meets resistance inside the channel, do not force it. The most likely causes: the piercing is not fully healed, the gauge is too thick for your hole, or you are not aligned with the channel. Remove the ring, spray saline on the piercing, wait a few minutes, and try again slowly from a slightly different angle. If it still will not pass through, your piercing may have partially closed or healed at a slight curve — see your piercer.
The ring looks crooked on my nose
This usually means the diameter is wrong. A ring that is too small sits at an odd angle because it cannot curve fully around the nostril. A ring that is too large hangs forward and creates a gap. Measure your nostril and confirm you have the correct diameter.
I cannot close the ring flush
If the ends overlap or leave a step, the ring was twisted too far in one direction. Hold both sides and gently adjust until the ends align perfectly. For thinner gauges like 22G, this can be fiddly — ring pliers with flat, smooth jaws help enormously. You can also ask your piercer to close it for you during a quick visit.
It hurts when I rotate the ring
Mild resistance is normal. Sharp pain is not. If rotating the ring causes real discomfort, the channel may be inflamed or partially healed internally. Spray with saline and leave the ring alone. If pain persists for more than 24 hours, consult your piercer.
After insertion
Spray with saline twice daily for the first 3–5 days after the jewellery change. Treat a hoop switch like a minor disruption to the piercing — it deserves a few days of gentle care.
Do not touch or spin the ring. It does not need to be rotated. The old advice of “turning your jewellery” is outdated and causes irritation. Leave it alone.
Sleep on the opposite side for the first few nights. Pillow pressure on a newly inserted hoop can push it out of position or irritate the channel.
Watch for irritation bumps. A small bump in the first week after switching is not unusual. Continue saline care. If the bump grows or persists beyond two weeks, the ring may be the wrong size or the piercing was not ready for a hoop.