Key takeaways
- Open a seamless ring by twisting the ends in opposite directions — never pull them apart sideways
- You only need a 2–3mm opening to insert the ring. Wider openings deform the circle permanently.
- Close by reversing the twist until you feel and hear the two ends click into alignment — run a fingernail around the ring to check for a gap
- A gap you can feel will snag on hair and clothing. A gap you cannot feel is acceptable.
- Helix and tragus are the easiest cartilage piercings to insert yourself. Rook and forward helix need a mirror system or a piercer.
- If the ring will not close perfectly, take it to a piercer — they can realign it in under a minute
What makes a seamless ring seamless
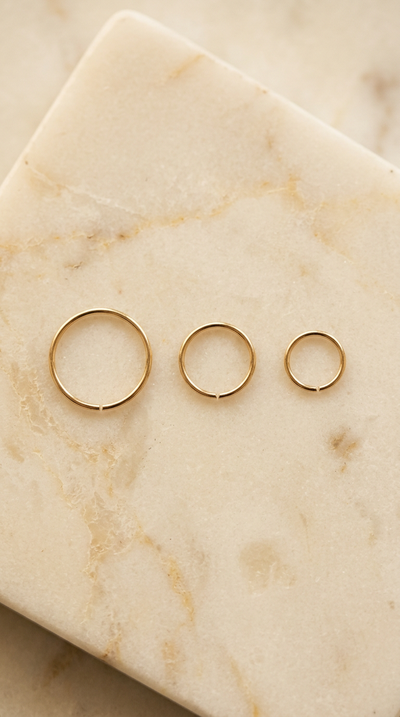
A seamless ring is a single unbroken circle of metal with a tiny cut at one point. That cut creates a small gap that allows the ring to open for insertion. When closed correctly, the gap is invisible — the cut ends align perfectly so no seam is visible or feelable. This is what separates a seamless ring from a captive bead ring (which has a visible bead) or a clicker (which has a visible hinge).
The practical consequence of this design: the ring can only open in one direction — a twisting motion that moves one end toward you and one end away. Any other motion bends or kinks the wire and permanently destroys the circular shape. Most people who damage seamless rings do so in the first 10 seconds of handling, before they realise the twist rule.
How to open a seamless ring correctly
Hold the ring with both hands
Grip the ring on either side of the gap with both thumbs and forefingers. The gap should face toward you, at roughly 12 o’clock if you imagine the ring as a clock face. You need equal grip on both sides of the cut.
Twist — do not pull
Move one hand toward you and the other hand away from you simultaneously. This twists the ring in the plane of the gap, rotating one end forward and one end backward. The gap opens as the two ends separate front-to-back. You should feel a smooth, spring-like resistance as the metal bends.
Stop at 2–3mm
You need only enough gap to pass through the cartilage — approximately 2–3mm. This is less than you think. Do not open it further. Every extra millimetre of opening increases the risk of permanently deforming the ring’s circular shape, which makes closing it flush later much harder.
The one move that destroys seamless rings
Pulling the two ends of a seamless ring sideways — apart from each other like opening a bracelet — overstresses the metal and creates a permanent kink at the bending point. The ring will never return to a perfect circle. The correct motion is a twist (like a doorknob), not a pull (like an O-ring). If you can feel the ring starting to resist or creak before the gap reaches 3mm, stop and reverse. You have hit the wire’s elastic limit.
Inserting the ring — step by step
Wash your hands
30 seconds with soap and water. Dry on a clean towel. No jewellery-changing should happen with dirty hands.
Set up your mirror
One mirror is often not enough for cartilage piercings. For helix and tragus, a standard bathroom mirror works. For forward helix, rook or daith, add a hand mirror or a phone on selfie camera so you can see the front and back of the piercing simultaneously.
Remove the existing jewellery
Unscrew the ball on a barbell and slide it out, or open the previous ring. Do this quickly if you are replacing a healed ring — cartilage channels narrow faster than lobe channels, though a fully healed piercing gives you several minutes before it starts to tighten.
Locate the piercing entry point
With the old jewellery removed, identify the front hole visually in the mirror. For piercings you cannot see directly (rook, daith), feel for the hole with a clean fingertip to locate it before approaching with the ring.
Enter from the front, angle toward the back
Hold the open ring so one end of the gap faces the piercing. Feed that end into the front hole at a slight downward angle to follow the channel. As the end passes through, the ring will curve naturally around the cartilage. Follow the curve — do not force it straight.
Rotate the ring through the channel
Once the leading end is through the front hole, rotate the ring so it feeds through the channel, with the wire following the curved path of the piercing. The trailing end of the gap will emerge from the back of the cartilage. If you feel resistance, do not force — reangle the approach slightly.
The ring should now sit around the cartilage with the gap open
Both ends of the gap should be visible or feelable on the outside of the cartilage. The ring is seated. Now close it.
How to close the ring correctly
Closing is the hardest part, because the ring is now around your ear and you cannot hold it with both hands in the same way.
Locate the gap by feel
Run a fingernail slowly around the ring until you feel the small offset where the two ends do not align. This is the gap. Position it at the front of the ring where you can see it in the mirror.
Pinch both sides of the gap
Use your forefinger and thumb to grip the ring on either side of the gap. Apply gentle inward pressure — pushing the two ends toward each other.
Reverse the twist until the ends meet
Apply a counter-twist (the opposite direction of opening) while pressing inward. The two ends should spring into alignment. You may feel or hear a tiny click as the ends meet flush. This click is the metal snapping into its rest position.
Check the closure
Run a fingernail slowly around the entire circumference of the ring. If you feel a bump, ledge or gap where the ends meet, they are not aligned. Repeat the twist-close. If you cannot feel any gap at all, the ring is properly closed.
The fingernail test is more reliable than visual inspection
A misaligned seamless ring gap is often invisible in a mirror but feelable with a fingernail. Hair and clothing catch on the feel-able gap, not on visual imperfections. Always do the fingernail test before considering the ring seated. If you can feel any offset, close again.
Insertion by piercing location
The technique is identical for every cartilage piercing, but the practical difficulty varies by how visible and accessible the piercing is. Here is what to expect at each location.
Helix EASIEST
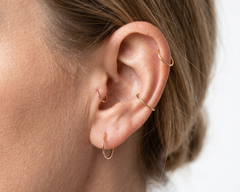
The helix is the outer rim of the upper ear — fully visible in a single mirror, accessible with both hands, and the ring enters and exits on the same visible surface. Most people can learn to insert a helix seamless ring in 2–3 attempts. The main challenge is closing flush while the ring is on the ear, which is easier here than any other cartilage location.
Tragus
The tragus is the small cartilage nub in front of the ear canal. It is visible from the front in a mirror but the back of the nub is not easy to see. The ring enters from the front and exits from the back, meaning you have to feel for the exit point. Once in, closing a tragus seamless ring is manageable because the gap can be positioned at the front where it is visible.
Forward helix
The forward helix sits at the very front of the ear where the helix rim meets the face. Because it faces forward, it is hard to see clearly in a single mirror — the mirror tends to show it at an angle. Use a phone in selfie mode alongside a bathroom mirror. The ring itself is tiny (5–6mm) which makes it harder to grip during closing. Beginners should have a piercer do the first forward helix insertion and watch the technique closely.
Rook HARDEST
The rook sits inside the ear bowl, surrounded by other cartilage. Both entry and exit holes are inside the ear, and your hand blocks your view while inserting. See our dedicated rook hoop insertion guide for the two-mirror setup and specific rook technique. For a first seamless ring change on a rook, a piercer visit is strongly recommended.
Daith
The daith is the fold of cartilage above the ear canal. It is easier than the rook because the fold faces outward and is partially visible in a mirror, but the ring has to navigate a tight fold and sits close to the ear canal. Daith piercings are often fitted with clickers or captive bead rings at the studio rather than seamless rings, specifically because clickers are easier to insert in this location.
Conch
The conch hoop is large (10–14mm) and wraps around the outer ear rim from a hole in the inner bowl. Because the ring is larger, it is actually easier to grip during closing. The challenge is that the ring has to travel a long path from the inner hole, around the outside of the helix rim. Once you learn the routing, conch insertion is straightforward — more so than rook or forward helix.
| Location | Self-insert? | Mirror setup | Main challenge |
|---|
| Helix | Yes — easiest | Single mirror | Closing flush at the back |
| Tragus | Yes | Single mirror | Finding exit hole by feel |
| Conch | Yes | Single mirror | Routing the large ring correctly |
| Daith | Possible | Single mirror + angle | Tight fold, proximity to canal |
| Forward helix | Difficult | Dual mirror or phone | Angle and tiny ring size |
| Rook | Difficult PIERCER RECOMMENDED | Dual mirror required | Blind insertion, hand blocks view |
Easy-close seamless rings
14K Gold Seamless Rings
Seamless rings in 16G & 18G. 5-10mm. Spring-tempered for perfect closure. 14K solid gold.
Shop seamless rings ->Troubleshooting — common problems
"The ring won't go through the piercing"
Two possible causes: the ring is the wrong gauge (too thick for the channel), or the piercing has partially closed. If you have not worn jewellery in this piercing for a while, the channel narrows. Try a thinner gauge first, or see a piercer to use a taper. Never force a ring that resists gentle pressure.
"The ring deformed when I tried to open it"
You pulled the ends apart instead of twisting. The ring is now kinked or bent out of shape. A jeweller can often re-form a kink on a thin gold ring, but it may not close perfectly afterwards. In future, open only with a twisting motion. If the ring is too bent to use, replace it rather than risk an imperfect closure that will catch on hair.
"The ring closes but there's always a gap I can feel"
The ring ends are not aligning in the same plane. This happens after repeated imperfect closures where the metal is twisted slightly past or short of alignment. Try twisting slightly further before releasing to see if the ends spring to a better position. If the gap persists regardless, take the ring to a piercer — they can physically re-align the ends with ring-bending tools in under a minute.
"I can't hold the ring and close it at the same time"
This is normal. Seamless rings require two-hand operation, which is difficult on an ear you can only reach with one hand. The trick is to use one hand to steady the ring (pressing one end against your finger as an anchor point) and the other hand to apply the closing twist. Some people find it easier to hold the ear still with one hand and use a fingernail from the same hand to nudge the gap closed while the other hand applies pressure from outside the ring.
When to stop and see a piercer
If you have attempted insertion more than 3 times and the ring will not go through, or if you have achieved insertion but the ring cannot close without a feelable gap, stop. Each failed attempt risks closing the channel (if the old jewellery is out) or further deforming the ring. A piercer will solve both problems in under 5 minutes for a small fee. The cost of a piercer visit is much less than the cost of a closed piercing or a ruined ring.
Seamless ring vs clicker — which is easier?
If this tutorial makes the seamless ring sound difficult, that is because it is — relative to a clicker. Here is the honest comparison:
| Seamless ring | Clicker |
|---|
| Opening | Twist — requires both hands and correct technique | Pull hinge open — one-finger action |
| Closing | Counter-twist to alignment — no audible confirmation | Press to snap shut — audible click confirms closure |
| Gap check | Required every time — no inherent confirmation | Not needed — click = closed |
| Look | Perfectly seamless — no visible join | Small hinge visible up close |
| Deformation risk | High if opened incorrectly | None — hinge is designed to open |
| Best for | Helix, tragus — piercings you can see clearly | Rook, daith, forward helix — piercings you cannot see directly |
For most people doing their first cartilage hoop change, a clicker is the more forgiving starting point. Once you are confident with clickers, switching to seamless rings for the cleaner aesthetic is a natural next step.
Frequently asked questions
How do I open a seamless ring without bending it?
Twist the two sides of the gap in opposite directions — one toward you, one away from you. Never pull the ends apart sideways. A sideways pull bends the wire at the stress point and permanently deforms the circle. Twist, stop at 2–3mm, insert, reverse-twist to close. That is the complete technique.
How do I know when a seamless ring is properly closed?
Run a fingernail slowly around the full circumference. If you cannot feel any bump, ledge or step where the gap is, the ring is properly closed. If you can feel anything, the ends are not aligned — twist a little further and check again. Do not rely on visual inspection alone — a gap that looks closed in a mirror can still catch on hair.
My seamless ring has a gap I can't close. What do I do?
Take it to a piercer. They have ring-opening and closing pliers that can physically re-align the ends. This takes under a minute and usually costs nothing or a very small fee. A permanently misaligned seamless ring catches on hair every day and can traumatise the piercing. Do not leave a feelable gap in place — either fix it or replace the ring.
How do I put a seamless ring in my helix?
In front of a mirror with good light: open the ring with a twist (2–3mm gap), hold one end at the front hole and feed it through, rotate the ring to follow the channel, then reverse-twist to close once the ring is seated around the helix rim. The fingernail test confirms the closure. Most people manage helix self-insertion comfortably after 2–3 practice sessions.
Is a seamless ring or clicker better for cartilage?
Both are excellent. Seamless rings look cleaner — no visible hinge, just a perfect circle. Clickers are easier to insert — one-hand hinge open, audible click confirms closure. For piercings you can see clearly (helix, tragus), seamless rings are very manageable. For piercings inside the ear (rook, daith, forward helix), clickers are significantly easier. Many people use clickers daily and seamless rings for occasions.
Can I put a seamless ring in a fresh cartilage piercing?
No. Cartilage piercings must heal on flat-back studs or curved barbells for the full healing period (6–12 months depending on the piercing). A seamless ring rotates inside the healing channel with every head movement, introducing bacteria and preventing the channel from stabilising. Only switch to a seamless ring after confirmed full healing.
←
Cartilage Piercing Size Guide
Every piercing — diameter, gauge and healing jewellery
Seamless rings that actually close
Spring-tempered 14K gold. Snaps to alignment. No feelable gap.
Shop seamless rings ->S
Stepoy
Piercing Jewellery Specialists
We craft handmade 14K solid gold piercing jewellery and publish in-depth guides to help you make informed decisions about your piercings.
Continue Reading
More piercing guides