Key takeaways
- The conch needs 6–12 months in a flat-back stud before switching to a hoop — longer than most other ear piercings
- Switching too early is the leading cause of conch irritation bumps, prolonged healing, and “my piercing was fine until I changed it”
- Five signs your conch is ready: zero tenderness, zero discharge, zero bumps, jewellery moves freely, and your piercer confirms
- The conch hoop path is unique — the ring threads through the ear bowl and wraps around the helix rim, making size selection critical
- Have your piercer do the first switch — the conch angle is awkward and the hoop path is harder to navigate than other piercings
- Use 14K solid gold or implant-grade titanium for the hoop — the switch itself is a stress event and safe material reduces complication risk
Why you need to wait
The conch sits in the thickest cartilage on the ear. Thick cartilage heals slowly — dramatically slower than a lobe, slower than a helix, slower even than a tragus. While the surface of your conch piercing may look and feel healed at 3–4 months, the interior of the channel is still developing.
Cartilage piercings heal from the outside in. The outer skin seals first, creating the appearance of a finished piercing. But the cartilage tissue lining the inside of the channel takes months longer to mature and stabilise. Inserting a hoop into a channel that is sealed on the surface but still soft inside causes the hoop to drag against immature tissue as it rotates, which triggers irritation bumps, discharge and healing setbacks.
A flat-back stud creates zero movement inside the channel. It sits stationary, allowing the interior tissue to mature undisturbed. A hoop, by contrast, rotates. Every head tilt, every touch of the ear, every hair snag causes the ring to shift position, dragging the wire through the developing channel. On the conch specifically, the hoop path is long (10–14mm from bowl to helix rim), which means more friction surface, more movement, and more potential disruption than a hoop on the tragus or helix.
The most common conch mistake
“My conch was healing perfectly. Then I switched to a hoop at month 4 and it flared up immediately.” This is the single most common complaint in conch piercing aftercare. The piercing was not fully healed — it was surface-healed. The interior channel was not ready for the movement and friction of a hoop. Waiting 6–12 months avoids this entirely.
Five signs your conch is ready
All five of these must be true simultaneously. If even one is not, wait longer.
✓
Zero tenderness
Press the jewellery from both sides. Wiggle it gently. No pain, no sting, no discomfort at all — even with firm pressure. If there is any tenderness, the internal tissue is not mature.
✓
Zero discharge
No crustiness on the jewellery, no dried lymph fluid, no residue of any kind. The piercing should be completely dry and clean for at least 4 consecutive weeks before switching.
✓
Zero bumps
No irritation bumps, no raised tissue, no discolouration around the piercing hole. The skin should be flat, smooth and the same colour as the surrounding ear. Any existing bump must be fully resolved first.
✓
Jewellery moves freely
The stud post slides smoothly back and forth in the channel without catching, sticking or producing a clicking sensation. Free movement indicates the interior walls of the channel are smooth and mature.
⚠
Piercer confirmation
Visit your piercer and have them check in person. They can assess the back of the piercing (which you cannot see), feel the tissue quality, and make a professional judgment. Do not self-certify readiness — let a professional confirm.
The 4-week rule
Even after all five signs are positive, wait at least 4 more weeks before switching. This buffer ensures the channel is not just mature but robust. A channel that has been completely symptom-free for a full month is significantly more resilient to the mechanical stress of a hoop than one that just reached symptom-free status yesterday.
Typical switch timeline
Month 0–3
Active healing
Discharge, crusting, occasional tenderness. The surface is sealing but the interior channel is still raw. Absolutely no jewellery changes during this phase.
Month 3–6
Surface healing complete
The piercing looks healed. Crusting stops. Tenderness fades. This is where most people get impatient and switch too early. The interior is still maturing. Continue wearing the stud.
Month 6–9
Interior maturing
The internal channel walls are thickening and stabilising. The stud moves freely. No symptoms. This is the earliest realistic window for some people — but only if all five readiness signs are positive.
Month 9–12
Optimal switch window
The safest time to switch. The channel is fully robust and can handle the rotation and friction of a hoop. Most piercers recommend waiting until this window. If you have had any complications during healing, wait closer to 12 months.
Month 12+
Fully established
A conch piercing with 12+ months of uneventful healing is a mature, stable piercing. The channel is as robust as it will get. This is the lowest-risk switch point. If you are nervous about the change, waiting until here gives you the best outcome.
Choosing your first conch hoop
Your first conch hoop needs to be the right size, the right gauge, and the right material. Getting any of these wrong turns the switch from a simple jewellery change into weeks of troubleshooting.
Diameter
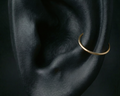
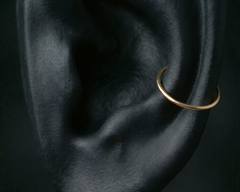
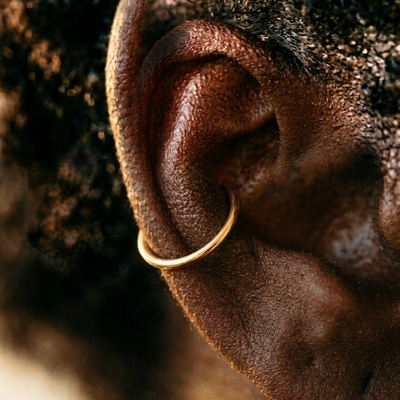
The conch hoop threads through the piercing in the ear bowl and wraps around the outer helix rim. The correct diameter depends on where your piercing sits and how wide your ear is at that point. Common sizes are 8mm (smaller ears, inner conch closer to the edge), 10mm (most popular — fits average ear anatomy), and 12mm (larger ears, inner conch placement further from the rim).
A hoop that is too small presses into the helix rim, creating constant inward pressure on the piercing. A hoop that is too large catches on hair and pillowcases, creating outward tugging. Both cause bumps. See our conch hoop size guide for measuring instructions.
Gauge
Match your hoop gauge to your piercing gauge. If you were pierced at 16G, buy a 16G hoop. If 18G, buy 18G. Do not use the switch as an opportunity to change gauge without consulting your piercer. See our conch gauge guide for details.
Material
The switch itself is a mild stress event for the piercing — new jewellery shape, new friction points, new movement patterns. Using premium material reduces the risk of the channel reacting to the change.
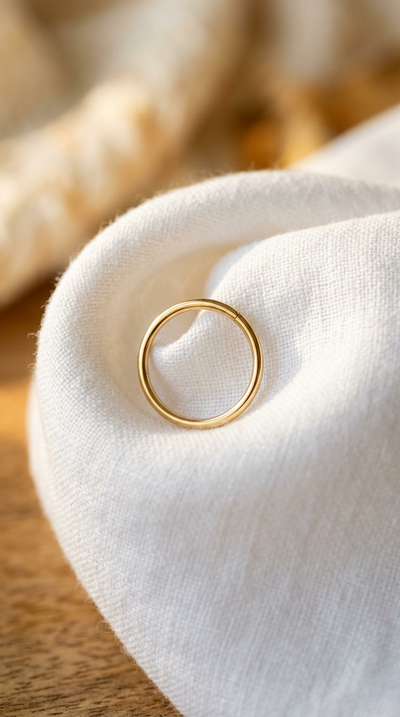
14K solid gold (nickel-free alloy) is the ideal choice for your first conch hoop. It is biocompatible, will not corrode inside the channel, and produces the warm gold aesthetic that makes the conch hoop so visually striking. A 14K gold ring wrapping the outer ear rim is one of the most dramatic pieces of fine body jewellery you can wear.
Implant-grade titanium (ASTM F-136) is the safe alternative if you prefer silver tones or want a budget option. Zero reactivity, very lightweight.
Avoid surgical steel, gold-plated, and sterling silver for the switch. The conch’s thick cartilage is unforgiving — introducing a reactive material at the moment of greatest mechanical stress is a recipe for bumps.
14K solid gold
14K Gold Conch Hoop
Seamless hoop. 8-12mm. 16G & 18G. The ring that wraps your ear. Nickel-free.
Shop conch hoops ->How to make the switch
Visit your piercer
For the first conch hoop switch, have your piercer do it. The conch angle is awkward — the piercing sits in the bowl of the ear, the exit is behind the ear, and the hoop must thread through and wrap around the helix rim. A professional has the tools, the angle and the experience to do this smoothly. DIY first-time conch hoop insertion frequently results in fumbling, frustration and accidental trauma to the channel.
Let them check your readiness
Before changing the jewellery, the piercer will assess the piercing. They check the back (which you cannot see), feel the tissue quality, confirm there are no hidden issues, and ensure the hoop you have chosen is the correct diameter and gauge.
Stud removal
The piercer unscrews or pushes out the flat-back stud. The channel is briefly empty. If the piercing is fully healed, this is painless — you may feel a slight sliding sensation as the post exits.
Hoop insertion
The piercer opens the seamless hoop, guides one end into the front of the piercing, threads it through the channel, out the back of the ear, and around the helix rim. They then close the gap. The entire process takes 10–30 seconds. You may feel pressure and a sliding sensation but no sharp pain if the piercing is mature.
Adjustment and check
The piercer positions the hoop so the join sits behind the ear (invisible from the front) and the ring wraps the helix rim evenly. They check that it does not press into the rim (too small) or gap away (too large). If the fit is not right, they may suggest a different diameter.
Once you are comfortable with the process, you can do future switches yourself at home. See our step-by-step conch hoop insertion guide for the DIY technique.
After the switch
Even a fully healed piercing may react mildly to a jewellery change. Expect:
Day 1–3: mild tenderness, slight awareness of the new jewellery shape. The hoop sits differently from the stud and your ear needs to adjust. This is normal and not a sign of a problem.
Day 3–7: tenderness fades. The hoop settles into a natural resting position. You begin to forget it is there.
Week 2+: the piercing feels completely normal with the hoop. No tenderness, no discharge. The hoop is part of your ear now.
Treat it like a fresh piercing for a week
After the switch, resume twice-daily saline sprays for 7–10 days. Avoid sleeping on the hooped ear for at least a week. Do not use over-ear headphones. Let the channel adjust to the new jewellery shape without additional pressure or friction. After a week, if everything feels settled, you can return to normal habits.
If something goes wrong
A bump appears after switching: this usually means the piercing was not fully ready, the hoop diameter is wrong, or the hoop material is reactive. Switch back to a flat-back stud, resume saline care, and wait for the bump to resolve before trying again. See our conch bump guide for treatment.
The hoop presses into the helix rim: the diameter is too small. Visit your piercer for a larger hoop. Do not endure a pressing hoop — it will cause a bump at the pressure point within days.
The hoop catches on everything: the diameter may be too large, or the ring may need to be repositioned so the gap sits behind the ear rather than at a snag-prone point. Visit your piercer for adjustment or downsizing.
Pain during insertion: if the hoop causes sharp pain going through the channel (not just pressure), the piercing may not be fully healed internally, or the gauge may be wrong. Stop and consult your piercer. Do not force jewellery through a painful channel.
Reasons to keep the stud
Not everyone switches to a hoop. Many people wear a conch stud permanently and are very happy with the look. Here is when a stud may be the better long-term choice:
| Conch hoop | Conch stud |
|---|
| Look | Dramatic ring wrapping the ear rim | Single point in the ear bowl, subtle |
| Headphones | Over-ear headphones may press on ring | No interference with any headphone type |
| Sleeping | Can press into ear when side-sleeping | Flat back — minimal pressure |
| Snagging | Ring can catch on hair, scarves, masks | Nothing to catch on |
| Maintenance | Occasional repositioning needed | Set and forget |
| Best for | Visual impact, curated ear stacks | Practicality, comfort, low maintenance |
Many people own both and swap depending on the occasion. A plain gold stud for work and daily life. A gold hoop for evenings and events. The switch becomes quick and easy once you have practised it a few times.
Frequently asked questions
Can I switch to a hoop at 3 months?
Almost certainly no. At 3 months, a conch piercing is surface-healed at best. The interior channel is still immature and cannot handle the rotation and friction of a hoop. Switching at 3 months is the most common cause of conch setbacks. Wait at least 6 months, ideally 9–12, and have your piercer confirm readiness before switching.
Should I switch the jewellery myself or go to a piercer?
For the first switch, go to a piercer. The conch hoop path is more complex than other piercings — it threads through the ear bowl and wraps around the helix rim at an angle you cannot easily see or control yourself. A professional does it faster, safer and with proper assessment of your readiness. Once you have seen how it is done, future switches can be done at home with practice.
I switched and got a bump — now what?
Switch back to a flat-back stud. Resume twice-daily saline sprays. Stop touching the piercing. The bump should begin to shrink within a week and flatten within 2–4 weeks. Once fully resolved, wait another 4–8 weeks before attempting the hoop again. Before the second attempt, have your piercer check the hoop diameter — the wrong size is a common hidden cause. See our
conch bump guide for the full treatment protocol.
What size conch hoop should I get?
10mm is the most popular diameter for standard ear anatomy. 8–9mm for smaller ears or conch piercings close to the outer rim. 12mm for larger ears or deeper inner conch placements. The correct size depends on your specific anatomy — measure the distance from your piercing to the outer ear rim and add 1–2mm. See our
conch hoop size guide for detailed instructions.
Can I switch between stud and hoop regularly?
Yes, once the piercing is fully mature (12+ months). Many people alternate: stud for work, gym and sleeping — hoop for social occasions and evenings. Each swap takes 30–60 seconds once you are practised. Always use clean hands, and if the channel ever feels tight or resistant, do not force the jewellery — apply a drop of saline to lubricate.
Why is the conch switch harder than tragus or helix?
Because of the hoop path. A tragus or helix hoop sits in a short, relatively straight channel. A conch hoop threads through the thick ear bowl, exits behind the ear, and wraps around the helix rim — a longer, curved path through denser cartilage. This means more friction during insertion, a more complex angle for the hoop to navigate, and a greater sensitivity to incorrect diameter. The conch is the most technically demanding hoop change on the ear.
←
Conch Piercing Healing: Your Complete Timeline
Week-by-week healing, aftercare, and when to change jewellery
The ring that wraps your ear. Real gold.
14K solid gold conch hoops. 8-12mm. Handmade, nickel-free, hypoallergenic.
Shop 14K gold conch hoops ->S
Stepoy
Piercing Jewellery Specialists
We craft handmade 14K solid gold piercing jewellery and publish in-depth guides to help you make informed decisions about your piercings.