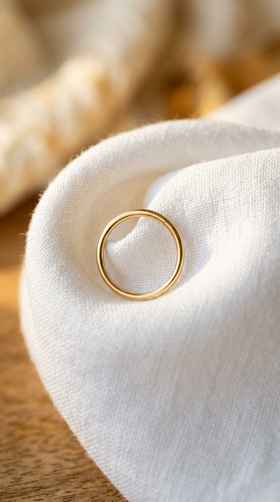
New 14ct Solid Gold Hoop


Elevate Your Ear Stack: The Allure of 14K Gold Seamless Helix Hoops

- Helix piercings are typically 18G or 20G — confirm yours before ordering. An 18G 14K gold helix hoop delivers the clean, thin line that defines modern ear stacking
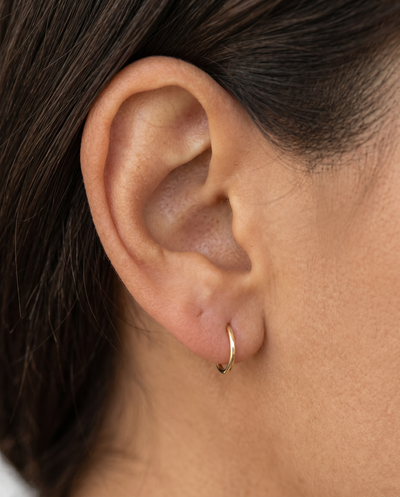
- An 8mm 14K gold helix hoop fits most standard helix placements — it creates the coveted “hugger” look that wraps closely around the ear rim
- Your piercing placement height matters more than your ear size: a low helix needs 6mm; a mid helix needs 8mm; a high helix may need 10mm
- Cartilage heals slower than soft tissue (6–12 months) and is more reactive to irritants — a solid gold helix hoop eliminates the risk of plated coating breakdown
- Wait until fully healed before switching from a stud to a hoop. Hoops move with every head turn, and movement disrupts healing cartilage
Understanding helix piercings and why hoops transform them
A helix piercing passes through the upper cartilage of the ear — the curved rim forming the outer edge. Unlike lobe piercings through soft tissue, helix piercings penetrate firm cartilage. This distinction matters enormously when choosing jewellery, because cartilage heals differently, heals slower, and reacts more aggressively to irritation than soft tissue.
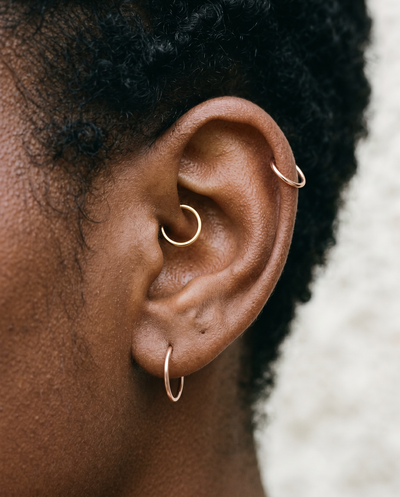
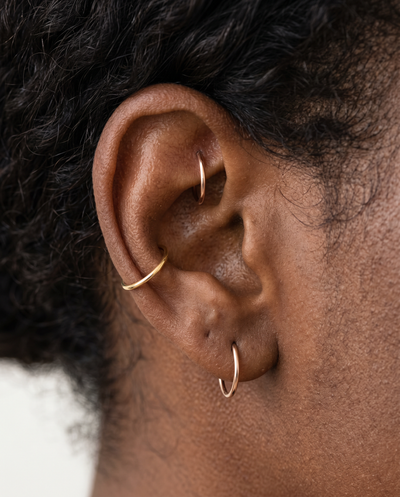
Once healed, a thin 14K gold helix hoop transforms the upper ear into a canvas for intentional styling. A single gold hoop hugging the rim is elegant on its own. Paired with a second helix hoop, a conch stud, or a tragus piece, it becomes part of a composition that tells a story about personal taste.
Why 14K solid gold for helix hoops
Cartilage piercings are notoriously slow to heal — 6 to 12 months for a helix, compared to 6–8 weeks for a lobe. During and after healing, cartilage tissue is more reactive to irritants than soft tissue. A plated ring that causes no issues in a lobe piercing can trigger persistent irritation bumps on a helix.
14K solid gold eliminates this risk. The alloy — 58.3% pure gold with palladium, silver, and copper — contains no nickel and does not corrode, tarnish, or shed coatings. It is one of only a few materials recommended by the Association of Professional Piercers for body jewellery.
Beyond biocompatibility, a solid gold helix hoop simply looks different from plated alternatives. Gold has a natural lustre and warmth that deepens with wear. An 18G gold hoop appears optically thicker and richer than the same gauge in titanium because gold reflects light more intensely. This subtle optical effect is why ear-stacking enthusiasts specifically seek solid gold pieces.
Choosing your helix hoop gauge
| Gauge | Thickness | Helix use | Notes |
|---|---|---|---|
| 16G | 1.2mm | Some helix piercings; daith, conch | Bolder wire profile — check with your piercer |
| 18G Helix Standard | 1.0mm | Most helix piercings | The standard for a thin 14K gold helix hoop — delicate and elegant |
| 20G | 0.8mm | Very delicate / fine-wire look | Popular for second and third helix hoops in stacked configurations |
An 18G 14K gold helix hoop is the sweet spot for most people. The 1.0mm wire is thin enough for the delicate cartilage aesthetic but strong enough to maintain its circular shape. A 20G wire is extremely fine and produces a barely-there look — ideal for stacking multiple hoops where you want each one to be subtle.
Finding your ideal helix hoop diameter
The diameter of your helix hoop determines how tightly it hugs the ear rim. Too small and the hoop pinches the cartilage; too large and it sticks out awkwardly. The key factor is not your ear size — it is the height of your piercing placement on the ear.
How piercing placement height determines your diameter
Low helix (just above the lobe, close to the edge): The cartilage is thin here. 6mm or 7mm creates a tight hugger.
Mid helix (standard position, mid-rim): An 8mm 14K gold helix hoop creates the coveted hugger look — a clean circle of gold wrapping the rim with just a few millimetres of visible gap.
High helix (near the top of the ear, farther from the edge): You need 9mm or 10mm for the hoop to clear the thicker cartilage and drape naturally.
How to measure at home
Paper strip method: Cut a narrow strip of paper. Hold one end at the outer edge of your ear where the bottom of the hoop would rest. Bring the strip up and over through the piercing hole. Measure — this is your minimum inner diameter. Add 1mm for comfortable clearance.
Existing ring method: Lay your current hoop flat on a ruler. Measure from one inner edge to the opposite inner edge. Size up or down from this known measurement.
Building an ear stack with 14K gold helix hoops
Ear stacking is the art of combining multiple piercings and jewellery styles into a cohesive look. A thin 14K gold helix hoop is the ideal foundation piece because it adds a clean geometric line without overwhelming the composition.
Three stacking principles
Odd numbers: Three elements (e.g., two helix hoops plus a conch stud) tend to look more balanced than two or four. Asymmetry creates visual interest.
Mix textures, match metals: Combine hoops with studs, flat-backs, and clickers for textural variety, but keep all pieces in the same metal colour. Mixing metals can look intentional if done boldly, but for a refined stack, colour consistency is key.
Graduate sizes: If you have multiple helix piercings stacked vertically, use slightly different diameters — for example, 8mm on the lower helix and 6mm on the upper. This creates a tapered cascade that follows the ear’s natural curve.
How to insert a seamless helix hoop
Wash hands and wear gloves
Clean hands are essential. Nitrile gloves provide dramatically better grip on the small, smooth wire.
Find the seam
Run your fingernail around the ring to feel the slight catch where the ends meet.
Twist open gently
Push one end forward, pull the other back. Open only 2mm — helix hoops are small and distort easily if over-opened.
Insert from the back of the ear
Thread one end into the back of the piercing and guide it through to the front. Apply sterile saline if needed to reduce friction.
Twist closed and position
Reverse the twist until the ends sit flush. Rotate the ring so the seam sits behind the ear, hidden from view.
Caring for your 14K gold helix hoop
- Spray with sterile saline once or twice daily if the piercing is under a year old
- Let warm shower water run over the ear — do not aim high-pressure directly at the hoop
- Do not sleep directly on the pierced ear; use a travel pillow with a hole if needed
- Keep hair, headphones, and hats from catching on the hoop
- Twisting or rotating the hoop inside the piercing during healing
- Over-the-ear headphones that press directly against the hoop
- Hair products, perfume, or hairspray that contact the piercing area
- Swimming in pools or open water with an unhealed piercing
- Pulling or snagging on the hoop when brushing hair or changing clothes
Common helix hoop buying mistakes
1. Switching to a hoop before the piercing is healed
Helix piercings take 6–12 months to heal fully. A hoop moves inside the channel with every head turn, hair brush, and pillow contact. This movement disrupts forming scar tissue and causes irritation bumps. Heal with a flat-back stud first; switch to a hoop only when your piercer confirms full healing.
2. Buying a hoop that is too tight
A hoop that pinches the cartilage creates the “cheese-cutter effect” — the wire slowly migrates through the tissue. If you feel sustained pressure when wearing a hoop, size up by 1–2mm immediately.
3. Using regular fashion earrings in a helix piercing
Standard fashion earrings are not designed for cartilage. They use different gauges, post lengths, and metal compositions. A regular earring post (typically 20G or thinner) in a helix pierced at 18G will wobble and cause friction.
4. Ignoring the gold type
“Gold” helix hoops at bargain prices are almost always gold-plated or gold-filled. The coating breaks down over time, exposing nickel-containing base metal to slow-healing cartilage tissue. For cartilage, insist on 14K solid gold.